Auto BIM Route AI Tips
A tour of the Auto BIM Route main window and how to configure the plugin settings — Graphics, Clash, Panel and Project Standards.
Last updated July 18, 2026
This page introduces the Start window, the main window and the Settings — use the table of contents above to jump to a section.
Auto BIM Route Start Window

In the Auto BIM Route AI ribbon tab, click Auto BIM Route to launch the plugin. This Start window appears every time you open it, before the model is collected.
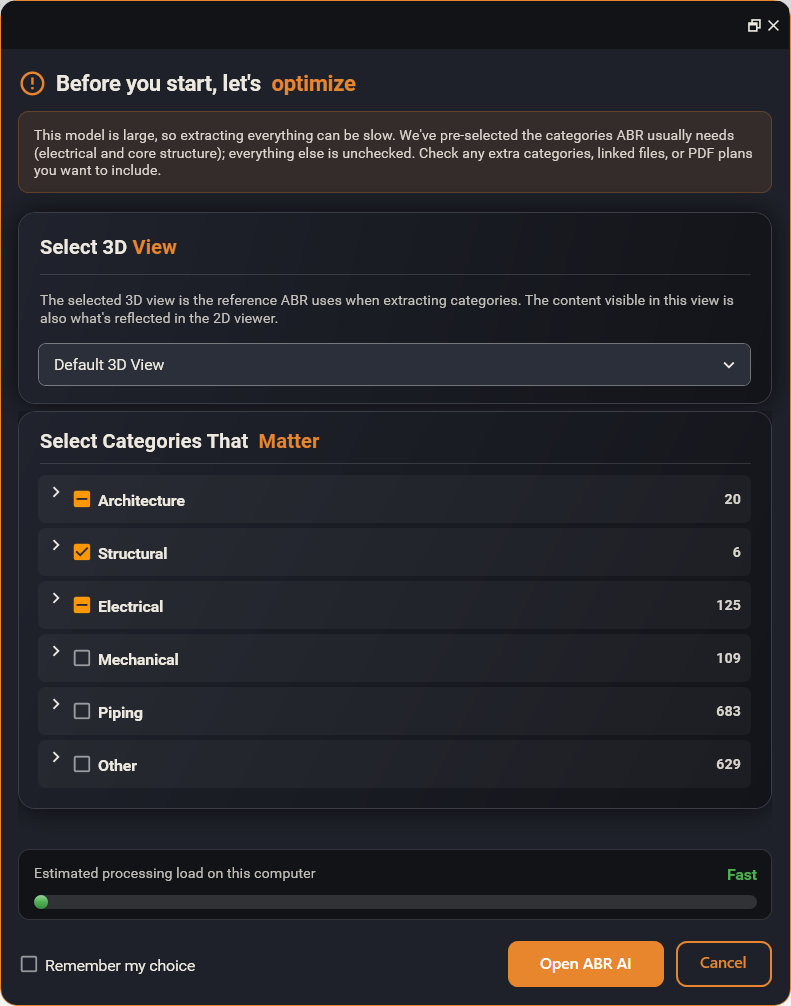
The Start window lets you choose exactly what ABR collects from your model:
- Select 3D View — the 3D view ABR uses as its reference when extracting categories. Whatever is visible in this view is also what appears in the 2D viewer.
- Select Categories That Matter — the categories collected into the viewer. ABR pre-selects the ones it usually needs (electrical and core structure) and leaves the rest unchecked; tick any extra categories, linked files or PDF plans you want to include.
This category selection overrides the Graphics settings. It is designed for large models: by collecting only the categories you truly need in the background, you cut the processing load and make ABR noticeably faster. The Estimated processing load gauge updates as you change your selection, so you can keep it in the “Fast” range.
Tick Remember my choice to reuse this selection next time, then click Open ABR AI to continue.
Resuming a session
If you open the plugin, close it, and open it again within the same Revit session, ABR asks how you want to continue:
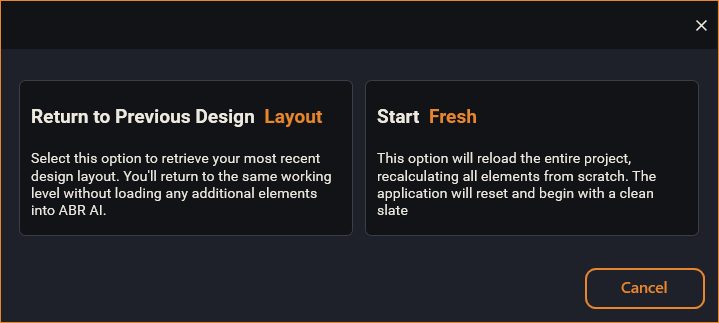
- Return to Previous Design Layout — retrieve your most recent design layout and return to the same working level, without loading any additional elements into ABR AI. Use this to preserve your work.
- Start Fresh — reload the entire project and recalculate all elements from scratch. The application resets and begins with a clean slate — a new session.
Main Window Introduction
The Auto BIM Route main window is divided into parts, and each part is a module with its own guide. Hover a highlighted area below to preview it, or click it to open that module’s page.
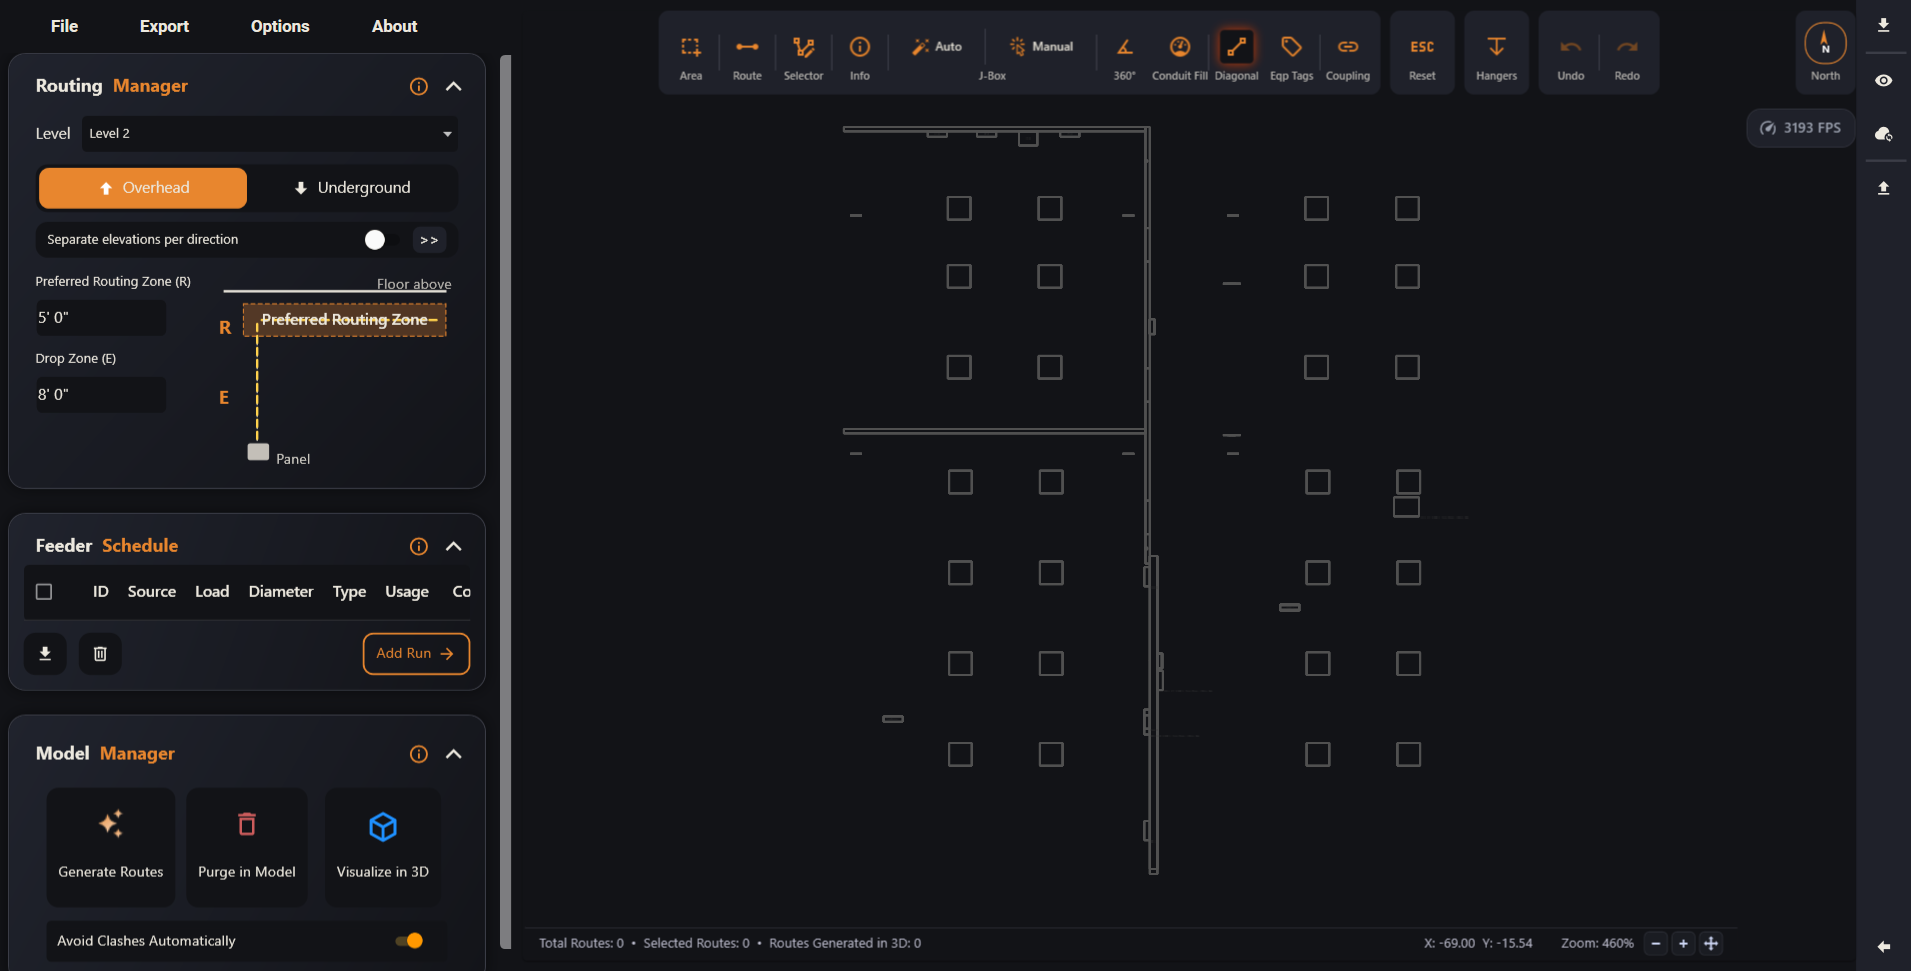 11. Routing Manager OptionsLevel, overhead/underground, preferred routing zone and drop zone.22. Feeder Schedule ModuleThe list of feeder runs to route.33. Action ButtonsThe viewer toolbar for drawing and editing routes.44. Model and Generation ManagerGenerate routes, purge them, and visualize in 3D.55. Menu Bar OptionsThe File, Export, Options and About menu.66. Context MenuRight-click shortcuts inside the viewer.77. Side BarLoad Runs, Visibility, Sync and Export.
- 1Routing Manager Options — Level, overhead/underground, preferred routing zone and drop zone.
- 2Feeder Schedule Module — The list of feeder runs to route.
- 3Action Buttons — The viewer toolbar for drawing and editing routes.
- 4Model and Generation Manager — Generate routes, purge them, and visualize in 3D.
- 5Menu Bar Options — The File, Export, Options and About menu.
- 6Context Menu — Right-click shortcuts inside the viewer.
- 7Side Bar — Load Runs, Visibility, Sync and Export.
Settings

Open the Auto BIM Route AI ribbon tab and click Settings (the gear icon shown above). The Settings window opens with four tabs — Graphics, Clash, Panel and Project Standards.
These settings are prerequisites. The first time you activate your license and open the Auto BIM Route application, it will ask you to configure them. Once you set them and click OK, they are saved and used as your defaults on every run — until you change them and save again.
Graphics
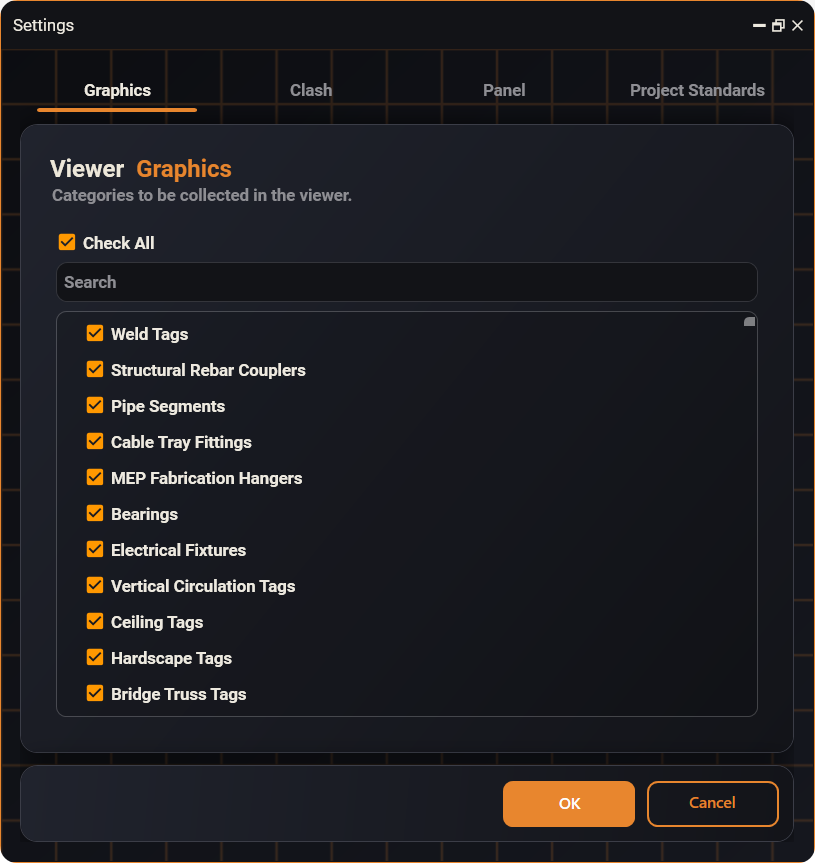
The Graphics tab controls which categories are collected and shown in the background of the Auto BIM Route viewer. Tick the model categories you want visible for context while you work.
- Use Check All to select every category, or the Search box to find a specific one.
- Tick only the categories that help you orient in the viewer — keeping the list focused keeps the viewer light and fast.
(You can override this per run from the Start window above — handy for large models.)
Clash
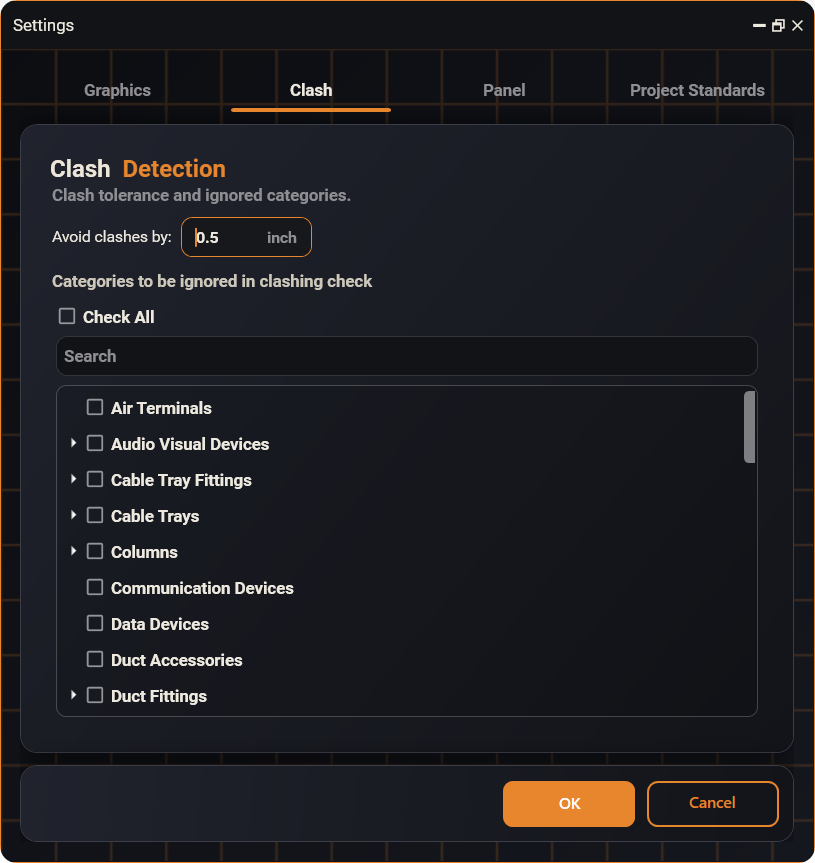
The Clash tab defines how Auto BIM Route detects and avoids clashes.
- Avoid clashes by — the clearance ABR keeps between routes and other
elements (for example
0.5 inch). - Categories to be ignored in clashing check — tick the categories ABR should ignore during clash detection. Everything you leave unticked is treated as an obstacle that routes must avoid.
Panel
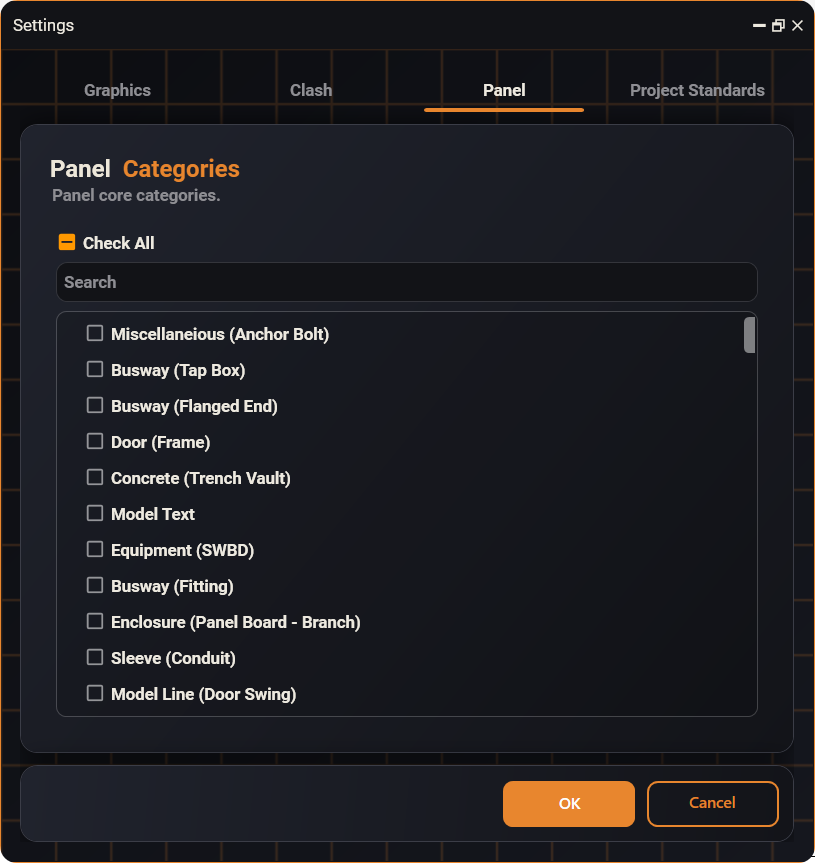
The Panel tab tells Auto BIM Route which categories represent the electrical panels — the routing source — in your model. Select the category (or categories) your panels are modeled with, so ABR knows where routes originate.
Project Standards
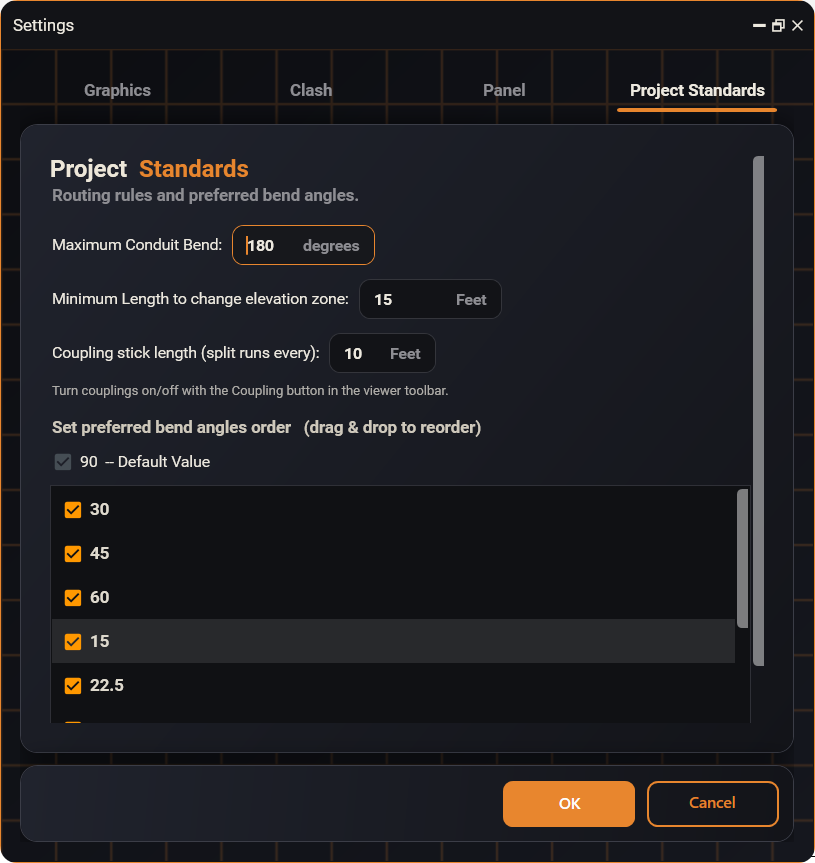
The Project Standards tab holds the default values ABR uses in its routing calculations.
- Maximum Conduit Bend — the largest bend angle allowed (for example
180 degrees). - Minimum Length to change elevation zone — the shortest run length before a
change in elevation is allowed (for example
15 Feet). - Coupling stick length (split runs every) — how often long runs are split
for couplings (for example
10 Feet). You can turn couplings on/off with the Coupling button in the viewer toolbar. - Set preferred bend angles order —
90°is the default value. Enable the additional angles you allow (for example30, 45, 60, 15, 22.5) and drag & drop them to set the order ABR prefers when routing.
Saving your settings
When all four tabs are configured, click OK to save. These values become your project defaults for every routing run. To change them later, reopen Settings, adjust any window, and save again.