Branch Automation — Overview
The standalone desktop app that turns an exported branch-circuit file into home-run boxes and routes, ready to build back in Revit.
Last updated July 21, 2026
Branch Automation is the standalone Windows application in the Auto BIM Route suite. It takes a floor plan that was exported out of Revit by Branch Circuit Export, generates the HR (home-run) boxes and the branch routes from every panel, and hands the finished design layout back to Revit — where the plugin builds it in the model.
The short version
- Import a design layout (
.abr) — exported from Revit by Branch Circuit Export. - Generate Routes — the app creates HR boxes and routes branches from the panels.
- Export the design layout — write the result back to an
.abrfile. - Import it in the Revit plugin — Auto BIM Route builds the boxes and routes in the model.
See The ABR Workflow for the full lifecycle.
Main Window Introduction
The Branch Automation main window is divided into parts, and each part is a module with its own guide. Hover a highlighted area below to preview it, or click it to open that module’s page.
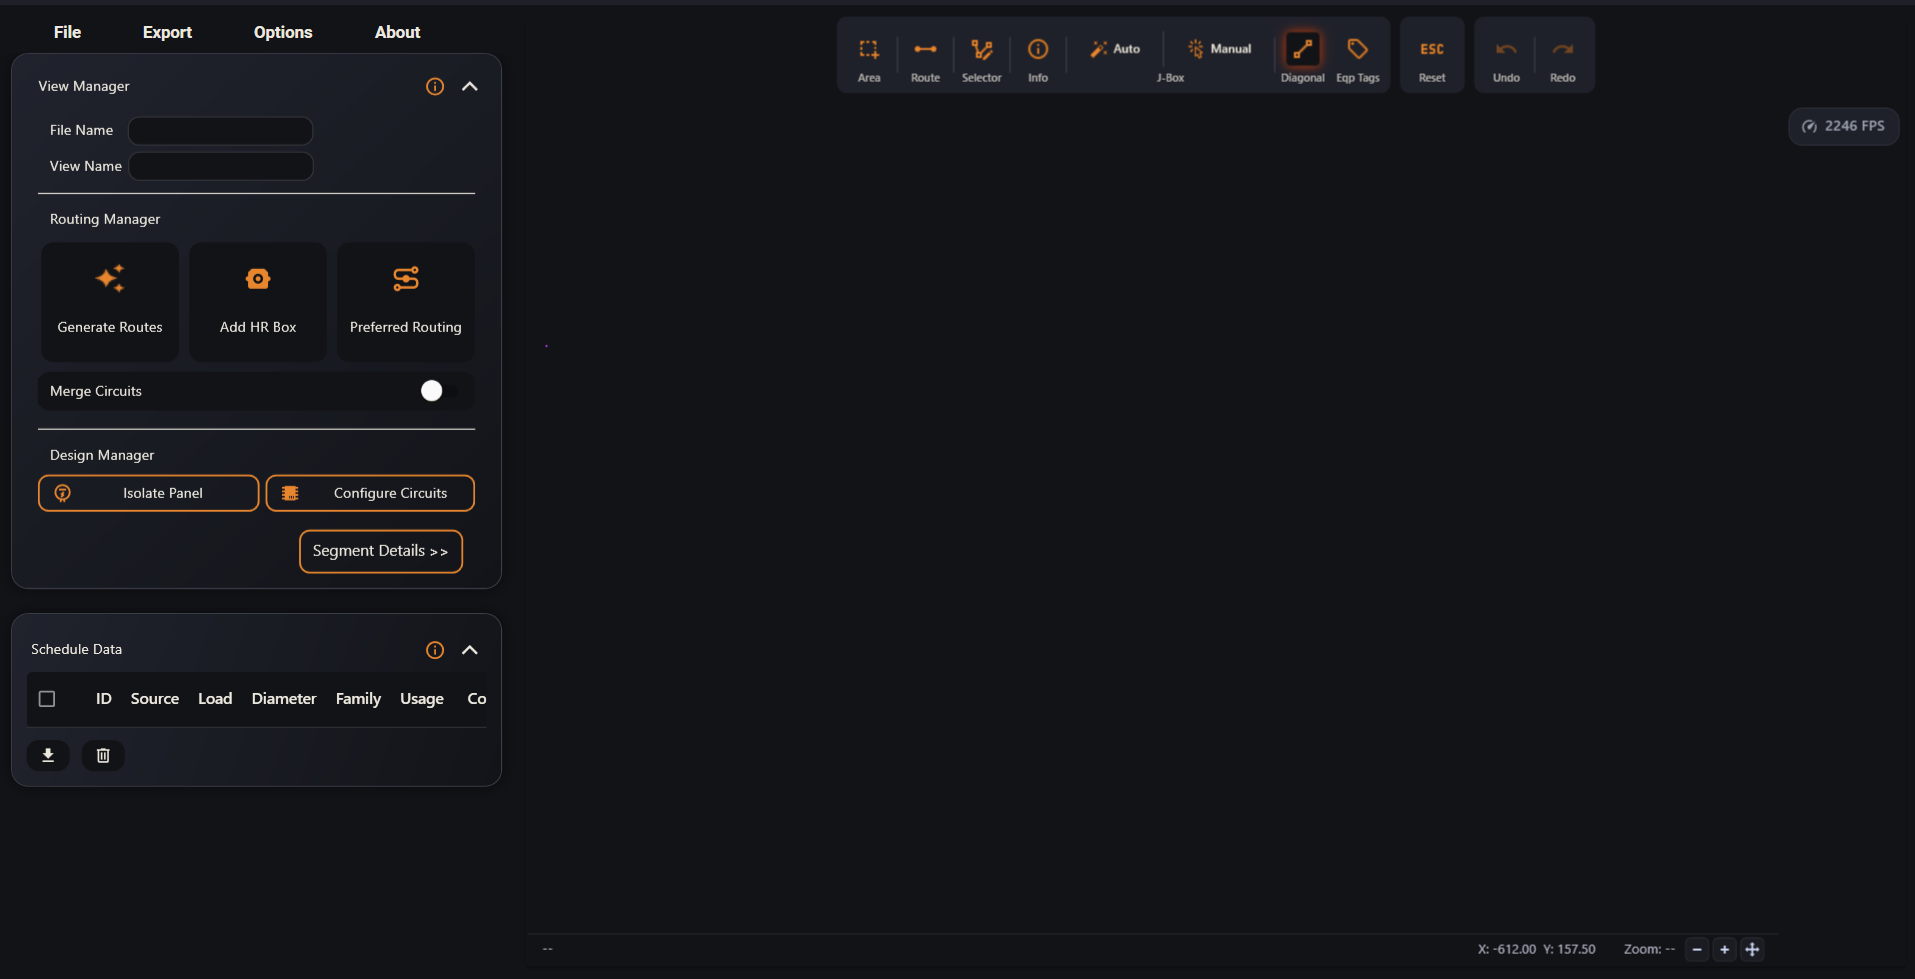 11. View ManagerThe file and view you are working on, and where a design layout comes in.22. Routing ManagerGenerate Routes, Add HR Box, Preferred Routing and the Merge Circuits toggle.33. Design ManagerIsolate Panel, Configure Circuits and Segment Details.44. Schedule DataThe table of every generated run.55. Action ButtonsThe viewer toolbar — the same tools as in the Revit plugin.66. Menu Bar OptionsFile, Export, Options (including Default Settings) and About.77. Context Menu ShortcutsRight-click anywhere in the viewer for the quick shortcuts.
- 1View Manager — The file and view you are working on, and where a design layout comes in.
- 2Routing Manager — Generate Routes, Add HR Box, Preferred Routing and the Merge Circuits toggle.
- 3Design Manager — Isolate Panel, Configure Circuits and Segment Details.
- 4Schedule Data — The table of every generated run.
- 5Action Buttons — The viewer toolbar — the same tools as in the Revit plugin.
- 6Menu Bar Options — File, Export, Options (including Default Settings) and About.
- 7Context Menu Shortcuts — Right-click anywhere in the viewer for the quick shortcuts.